

This post will cover the TreeGridContainer, a UI component for displaying information in a table while allowing for expanding or contracting to show child rows. For this, we assume basic familiarity with Javascript, as well as comfort with methods and forms in Aras innovator. The screenshots in this post were taken on Aras Innovator Version 12 Service Pack 4, and while the steps should be similar if you’re on Version 12 you may notice some small changes in what you see if you’re using a different service pack.
A bit of setup: you’ll need a place to see your new tree grid. Take a look at Custom Form UI Best Practices or Standard Aras Dialogs for a straightforward guide to creating a custom form that your TreeGridContainer can be displayed in, but keep in mind that the grid can be shown in a great number of places within Aras Innovator, not just a form.
Making a Place for the Grid
For this example, I'm going to be building a grid in a form within a dialog. To be clear, you can display a TreeGridContainer anywhere that your own methods can display; dashboards, dialogs, even an item tab. The dialog approach is simply one that builds on previous posts. If you have somewhere else in mind for your TreeGridContainer, skip ahead to the Displaying The Grid section.
- Create a form. In our example, this is named "example_TGC"
- Give example_TGC an html field.
- Create a method to open a dialog, showing the form from step 1. In our example, this is named "Open_TGCForm"
- Create an action which will run the method from step 2.
- Create a second method. This is where most of the TreeGridContainer code will run, and in our example it's named "example_gridManager"
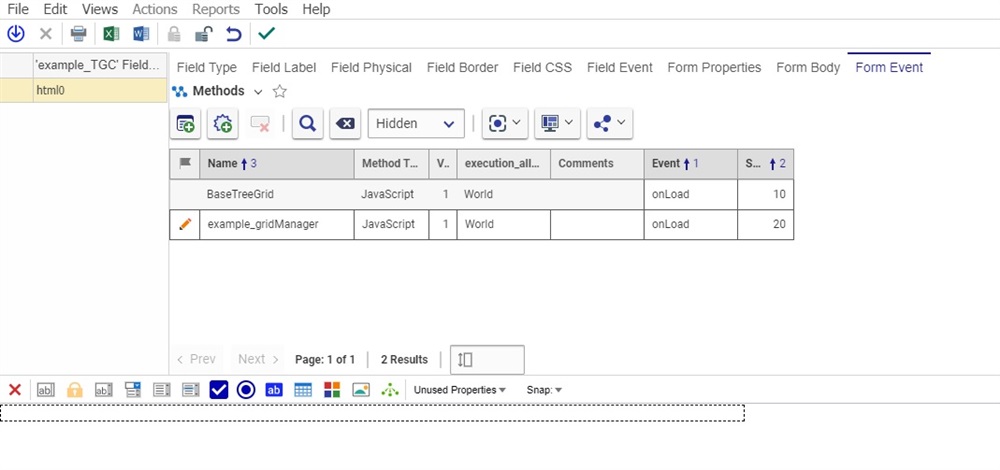
- Go back to example_TGC.
- Give it two form events that run on load: one should be the "BaseTreeGrid" method, which is standard in Aras Innovator installs.
- The other form event should be example_gridManager. Make sure that TGC is after BaseTreeGrid in the sort order.
If you find yourself needing more detail during the above steps, take a look at the Custom UI Best Practices blogpost. As a quick test, see if you can create some text with "Hello World" or the like and then open the form to see your text. If you can, we're ready to move on.
Displaying the Grid
The first step is to simply display a grid. For this, the grid.InitXML() function is crucial. It takes two arguments, the first being an XML string representing what the table should look like, the second being a Boolean that controls “lazy loading.” For our purposes, we want the Boolean to be True.
What does the XML string need to look like? It needs to contain the table settings, as well as the headers and the column settings. It also needs values for each row. A very basic table might look like the following:
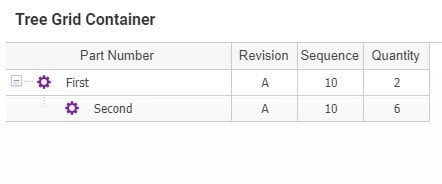

Pay close attention to the two rows. Those lines that start with “<tr level” and go on to describe all the values you’ll see in the tree grid. Notice how the second one is inside the first? That makes it a child of the first, meaning you’ll be able to expand or contract the row underneath the first.
There’s one more quick note here: You’ll notice the fixGridHeight function. That’s there because you want to make sure the grid is sized correctly. Add the following function, defined below:
Make sure your grid displays correctly with the hardcoded values before moving on. From this point, all changes we’ll make will be in this one method.
Context Actions
The TreeGridContainer is a powerful class. One of the things it gives us access to is a context menu, which can allow all sorts of actions within your new grid. To set one up, lets start by changing the control to add some click events:
Now, if you right click somewhere on the grid, you’ll get a context menu with a single option. Add. Whatever code you want to write can fire from there, and we’re about to write up a bit of code to add a row wherever we’ve clicked.
Adding a Row
We’ll hard code it again, but one idea might be to make this open up a part selector dialog, or any other search grid commonly used in Aras Innovator. Look to the comment in Add, where we can insert code we want to run when a context menu action is clicked, and insert the following.
Now, TreeGridContainer is best suited for information where some pieces are nested “children” under other pieces. BOMs are one natural fit for this, but remember we ultimately just need our information to be formatted in correct XML for the tree grid to display, and then to rerun .initXML() with the new values.
Conclusions and Congratulations
Now you know how to display a tree grid container, how to add a context menu to it, and how to add rows to the grid. From here, whatever kind of loading or data manipulation you want to do is available via your trustworthy Innovator objects and a bit of AML. Just remember to parse it into XML, and TreeGridContainer can handle it. Let us know what solutions you build with this in the comments below!