

Experience a better way of using Aras Innovator® with our latest updates to low-code customization features! One feature introduced recently in Release 28 is adding a responsive form design editor that utilizes a more intuitive, easy-to-use interface.
Admins can now define a container-based layout with the ability to drag and drop structural elements and fields. In this example, we will go through a quick tutorial on setting up a Responsive Form on an ItemType of your choice!
Configuration:
Now let’s review the steps for adding one of our new forms to an ItemType. In this example, we will use the Part ItemType, but you can use any ItemType you choose.
- First start by logging into your Aras Innovator instance and go to the TOC > Administration > ItemTypes to search for the Part ItemType and open it
- Next click the Edit button and select the Views relationships tab
- Add another form by clicking the “New Form” button
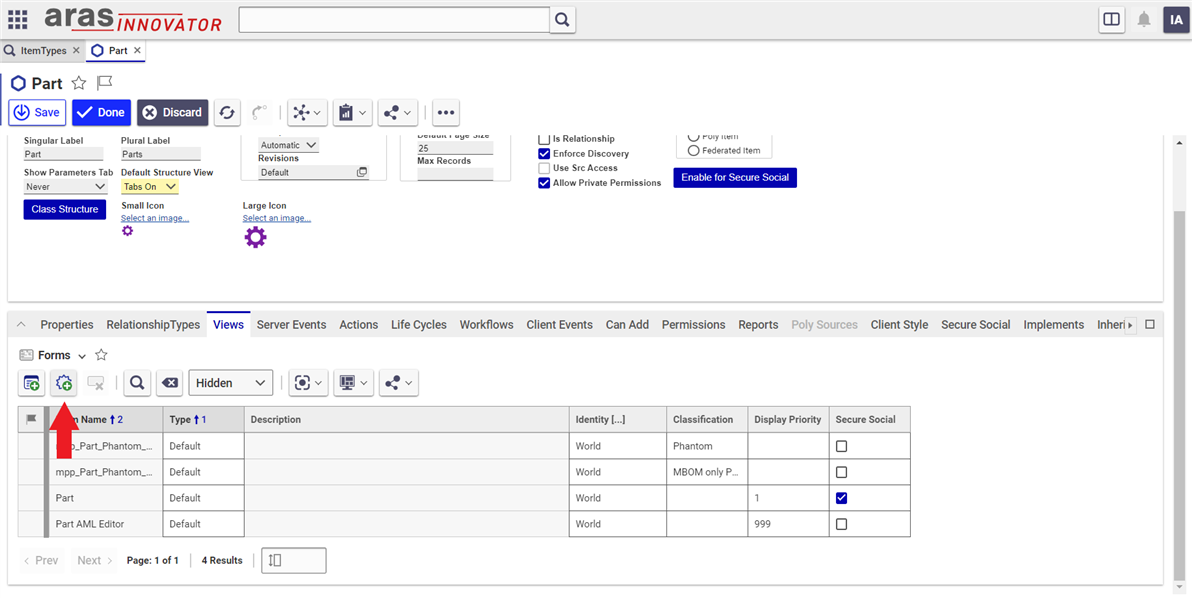
- In the “Form Name” type in something like "Responsive Form” and set the “Type” to “Default”
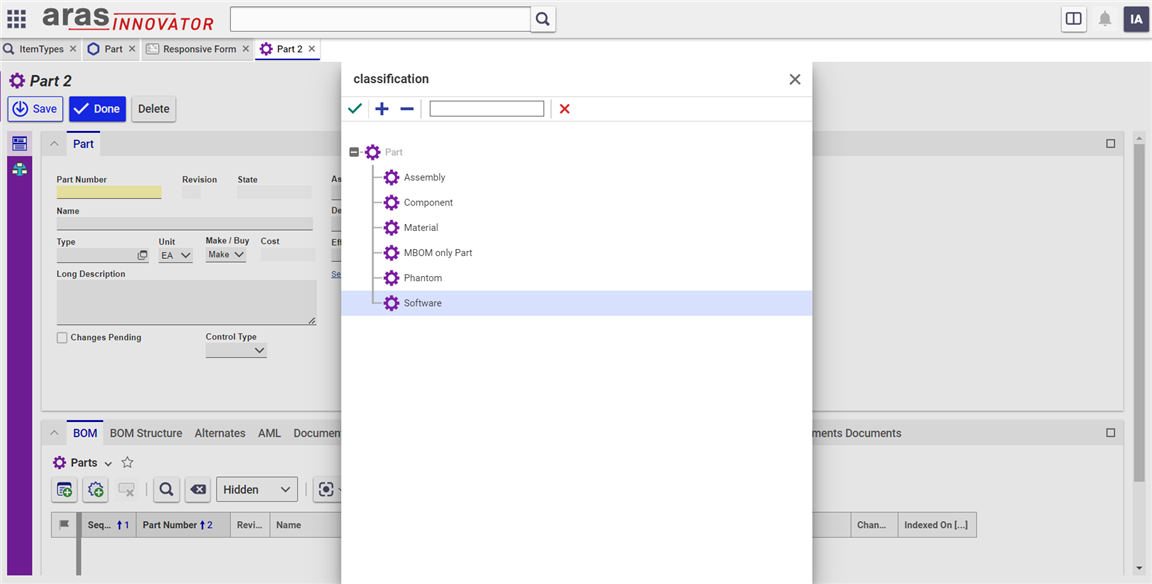
- Give the new form a "Classification;" in our example we will use “Software”
- Click on the Done button and open the new responsive form
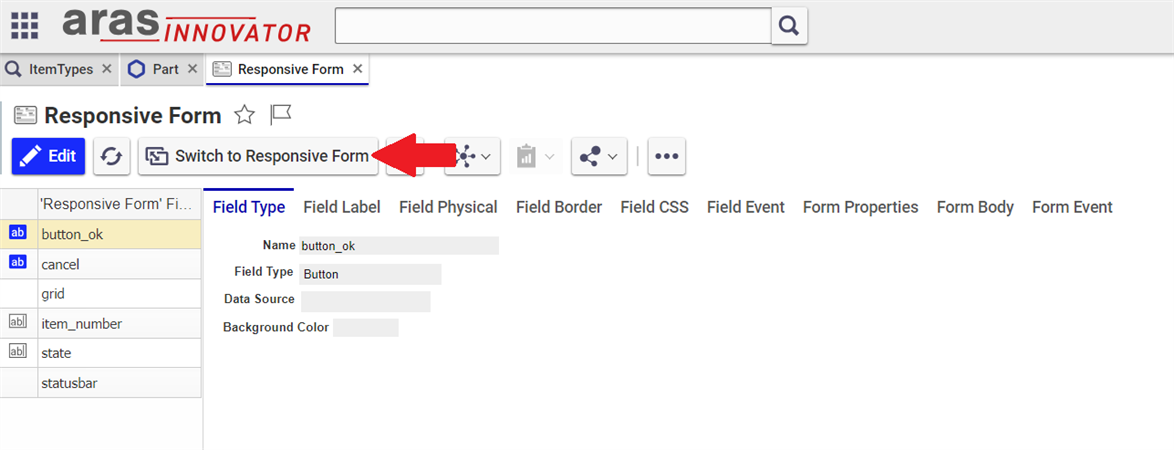
- When the form opens you will first see the old editor format; at the top there is a button for “Switch to Responsive Form”. Note when switching to a responsive form, if there was already a previously designed one the responsive switch will not carry over its data
- It should look like this after the switch:
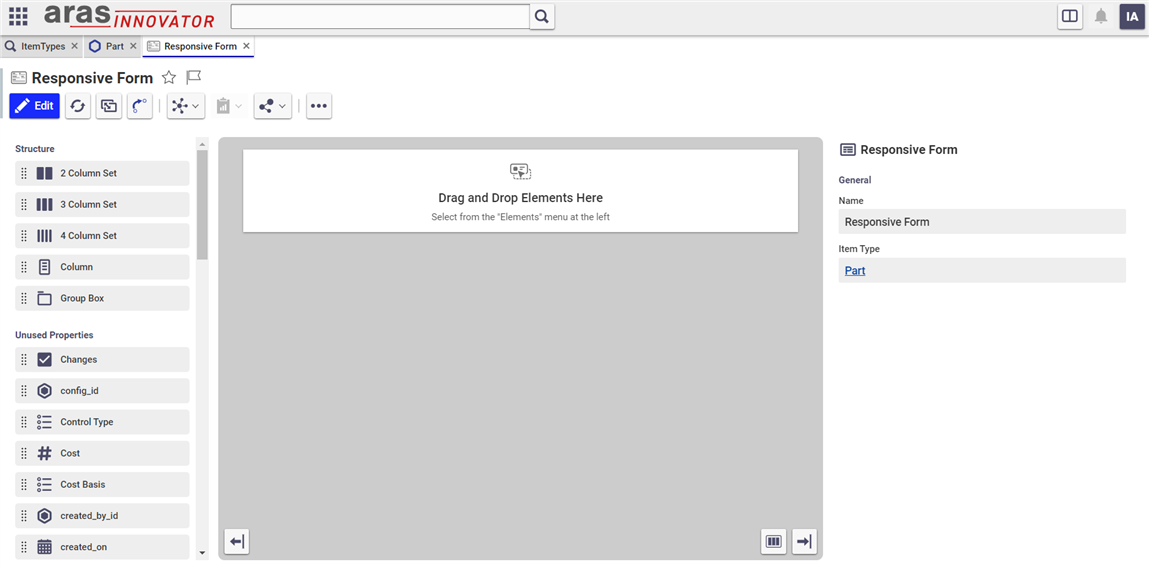
- As you can see on the farthest left side of the editor there are two different sets of elements we can select blocks from, Structure and Unused Properties. Structure can be used for formatting elements into columns and boxes. Unused Properties are simply the properties we can include on the form such as part number or description.
- For simplicity, let's create a very simple form and add 2 columns with 4 properties. First, click and drag “2 Column Set” into the form, then drag "keyed_name" and "Part Number" into the left column; then drag "Name" and "Description" to the right column. It It should look like this:
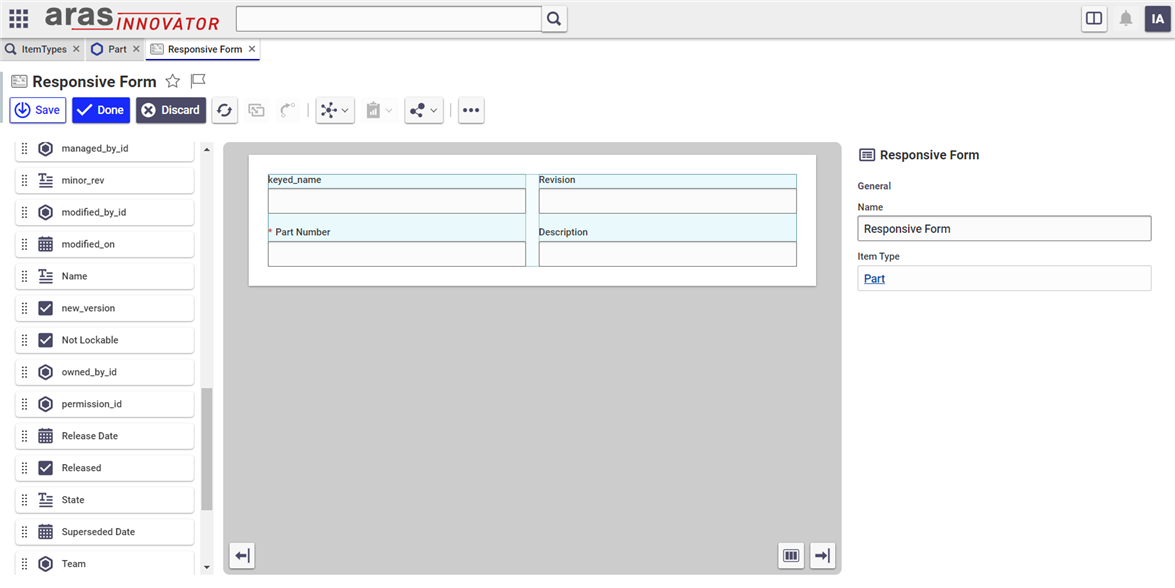
- If you click on any of the elements dragged into the form you will see more configurations on the right pane as well. Let's click on the "Keyed_Name" property and give it another name, such as simply “Name”

- Now let's take a look at the form in action and make sure it looks the way we want it to. Open up the TOC > Design > Click on Parts and then click on "Create New Part"
- Initially we will see the old default Part Form, but we can change it to the new form using the classification we set earlier. Click on the Type property and select “Software” from the drop-down:
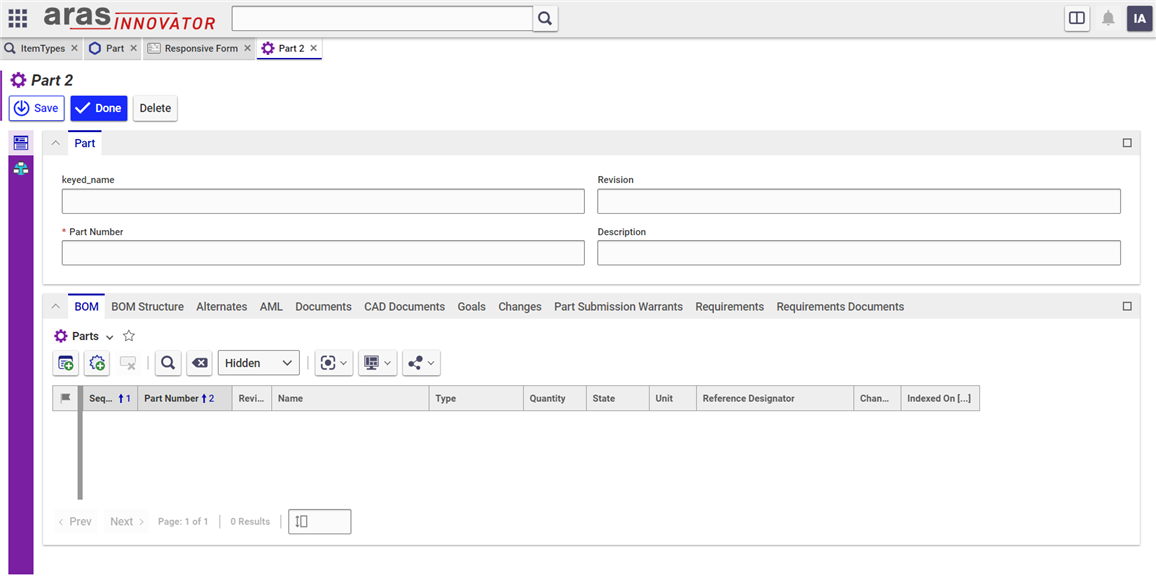
- If everything is configured correctly it should look like this:
Conclusion:
Thank you for following our short tutorial on responsive forms. Let us know if this blog was useful in the comments below! In future posts we can delve into more detail and review customizations in the responsive editor.