

Aras provides a collection of built-in SVG images for use in ItemTypes, forms, documents, and more. While the default images fit a range of use cases and needs, you may have a scenario that requires a custom ItemType icon. In the steps below, we will create a custom icon for the Internal Document ItemType, based on the default Document icon.
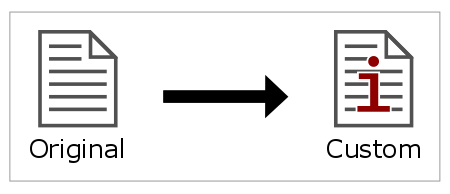
Document Icon - Before & After
Step 1: Select Base Icon
You can view the full collection of SVG icons provided in Aras one of two ways. The first option is to open up the code tree in the file system and browse through the images in [Install Path]\Innovator\Client\images.

Contents of [Install Path]\Innovator\Client\images
The second option is to login to Aras and view the images with the image browser. To do so, open up your ItemType for editing and click Select an image... under the small icon or large icon fields. Once you've chosen an image you want to use, we need to determine the file name. Right click on the icon in the image browser, select Properties (or Inspect, depending on your browser), and make note of the file's name.

Aras Image Browser - ItemType Icons
Once you've determined which image you want to use as a base for your custom icon, we need to make a working copy. This will prevent any accidental changes to the original SVG file. Copy the base icon SVG file into the customer folder in the code tree at [Install Path]\Innovator\Client\customer and give it a new name.
Step 2: Edit Icon in Vector Graphic Editor
To edit the SVG icon, you will need a vector editing tool. There are paid tools available, such as Adobe Illustrator, as well as many open source or free tools like Inkscape or Vectr. We use Inkscape in the screenshots below.
Once you've selected your editing tool, you're ready to start customizing your ItemType icon. Load up your vector editing tool and open the working copy of your base icon from the customer folder in the Aras code tree. For our Internal Document icon, we've decided to add a red "i" to the default Document icon.
![]()
New Internal Document ItemType icon in Inkscape
When you are satisfied with your custom icon, save your changes. Be sure to save the file in SVG format. This will ensure that you can use the same file for both the small icon and large icon properties on your ItemType without degrading the quality of the graphic.
This article does not focus on the mechanics of vector graphic design and editing, but there are many resources available online. Here are just a few:
- Creative Bloq has an extensive list of vector graphic tutorials.
- Speckyboy Design Magazine has tutorial lists for both Adobe Illustrator and Inkscape.
- Inkscape itself provides a gallery of official and community designed tutorials.
Step 3: Update ItemType Icons
Now that we've saved our new SVG icon to the code tree, we are ready to set the small icon and large icon properties on our ItemType.
![]()
New Icon added to Internal Document ItemType
Open up the target ItemType for editing, and click Select an image... under the small icon field. Once the image browser has loaded, click the Open File icon on the External tab. Navigate to the customer folder at [Install Path]\Innovator\Client\customer and select your custom SVG file. Repeat the same steps for the large icon field and save the ItemType.
Your custom icon will now appear in the TOC, in the detail pane, and on the item form.
![]()
New icon appears on Internal Document form
Looking For More Tech Tips?
Subscribe to our blog and follow @ArasLabs on Twitter for more helpful content! You can also find our latest open-source projects and sample code on the Aras Labs GitHub page.